


Those of you who updated their Samsung Galaxy Note with XXLT9 build Android 4.1.2 and are looking for a way to root can follow this easy and safe step-by-step tutorial. There are two ways to root: one via stock recovery and another using Odin. Either way, you have to look carefully at the following prerequisites to make sure everything is alright before you continue to the actual rooting process.
NOTE! We are not responsible for anything done to your device. Please follow the steps mentioned in this tutorial very carefully and bear in mind that rooting will void the device warranty until you unroot it.
Prerequisite Steps:
- As this process will likely corrupt or erase some information, please make sure you backup all your information: Images, Songs, Contacts, Message, and so on.
- Enable USB debugging on your device. For 4.1.2 go to Settings > Applications > Development > USB debugging.
- Install the official USB drivers for all Galaxy devices from Samsung Developer page.
- Charge your phone’s battery to last trough the entire process. It shouldn’t be lower than 60%.
- Check whether you Galaxy Note is factory unlocked or not. Please don’t try this guide on factory locked devices.
- The guide works only for the N7000 version of Samsung Galaxy Note. We do NOT recommend this guide for other versions than this.
Rooting via Odin:
- Download PhilZ-cwm6-XXLT9-ORA-5.08.5.tar.md5 for Samsung Galaxy Note on your computer.
- Download and extract Odin v3.07.
- Turn off your handset and then put it into Download Mode by holding Volume Down, Home and Power buttons all together until the “Warning!” screen pops up. Now press the Volume Up button to continue.
- From the earlier extracted folder, run Odin.exe as Administrator and connect your Galaxy Note to computer via USB. ID:COM box should now turn yellow (or blue). A successful connection should also be indicated by an “Added” message in Odin. This step might take some time.
- Once your phone has been successfully recognized, press the PDA button in Odin and pick the .tar.md5 file extracted during the first step.
- Make sure the Auto-Reboot and F.Reset Time option are checked. Do NOT touch any other checkbox.

- Click on the Start button in Odin for the installation process to begin. It will take up to 6 minutes, so please be patient.
- Eventually, you will get a “Pass!” notification in the ID:COM box and your device will reboot automatically.
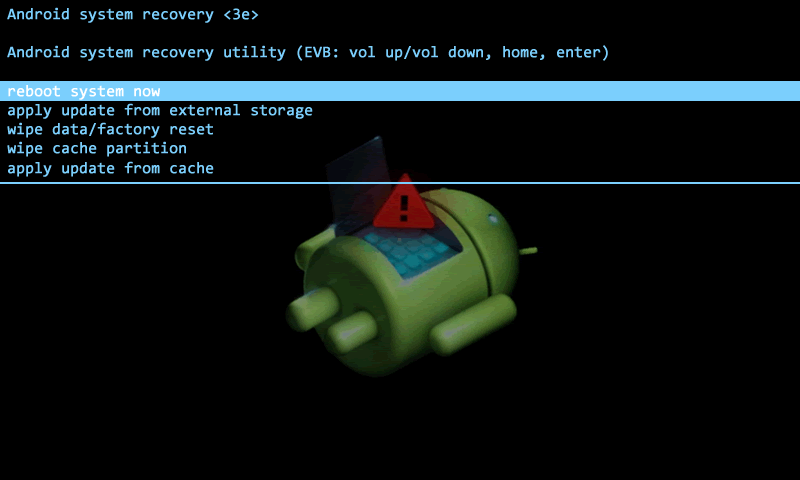
Rooting via stock recovery:
- Download PhilZ-cwm6-XXLT9-ORA-5.08.5-signed.zip file for your Galaxy Note to desktop.
- Connect the smartphone to the computer via USB cable and then copy the zip file downloaded earlier on the SD card.
- Switch your phone off and disconnect it from the computer.
- Boot your Galaxy Note into stock recovery mode by holding Volume Up, Home and Power buttons all together.
- In the main menu, select apply update from external storage and locate the zip file copied on the SD card.
- Confirm installation and let the process begin.
- After it’s finished, return to main menu and select reboot system now.
Either way, your Samsung Galaxy Note N7000 running on XXLT9 Android 4.1.2 Jelly Bean should now be rooted.


HOW-TO: Root Android 4.1.2 on Samsung Galaxy Note N7000