To turn your mobile into a Wi-Fi hotspot is kind of tough but very beneficial feature, and fortunately this is very simple and easy to do on the Nexus 4 and should only take about 30 seconds to do. Here we will tell you how you can setup Wi-Fi hotspot in very simple and easy steps. You just follow the following steps.
Data Usage >Settings> (More)>Tethering & Portable hotspot>Set up Wi-Fi hotspot
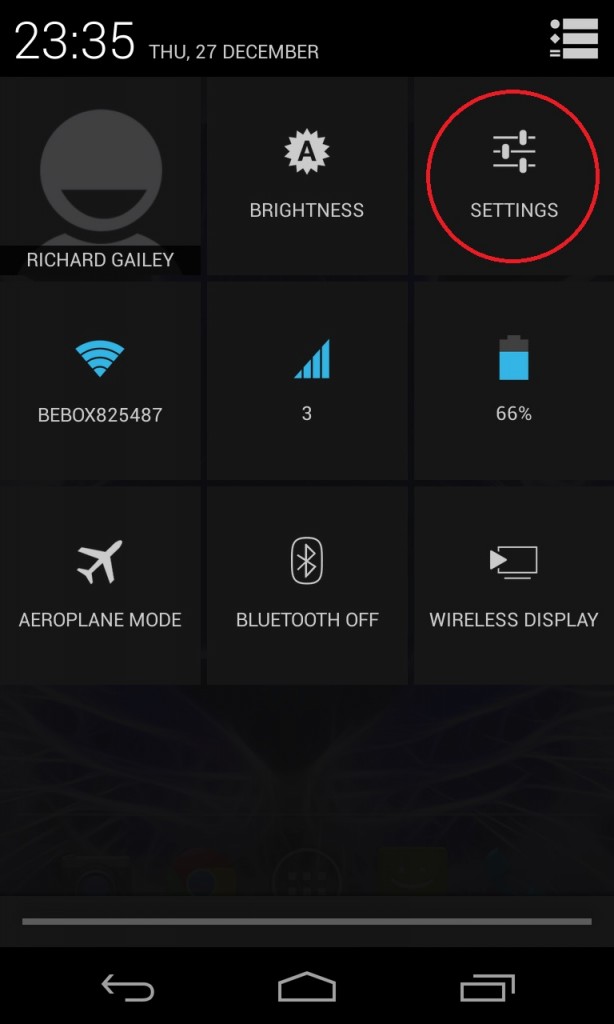
- In 1st step to get your settings simply hold and slide your finger from top of the screen downloads.
- In 2nd step now just select the icon at the top right corner.
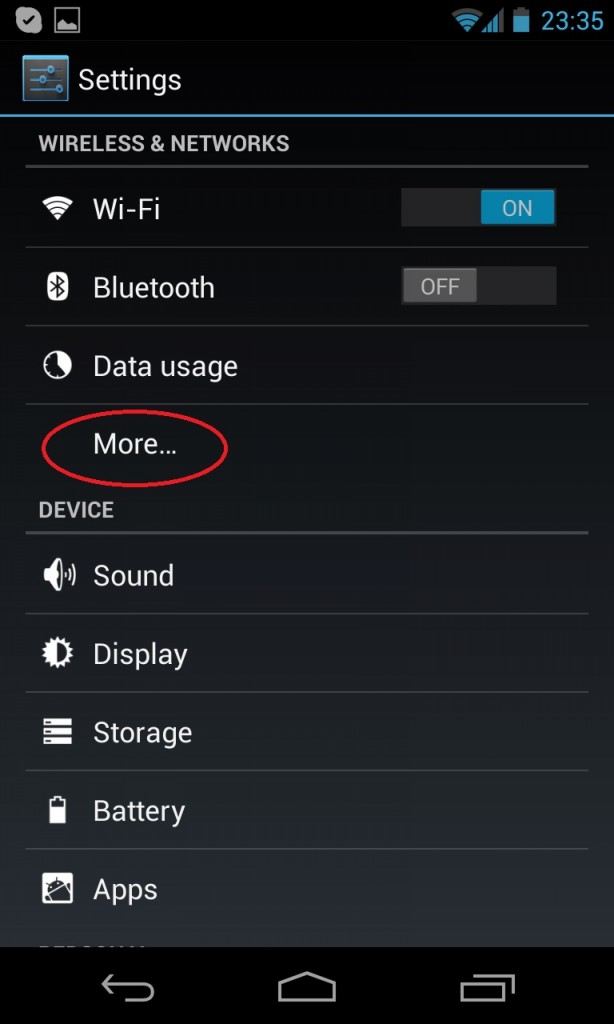
- Now Select Settings
- Below Data Usage Select More Option.
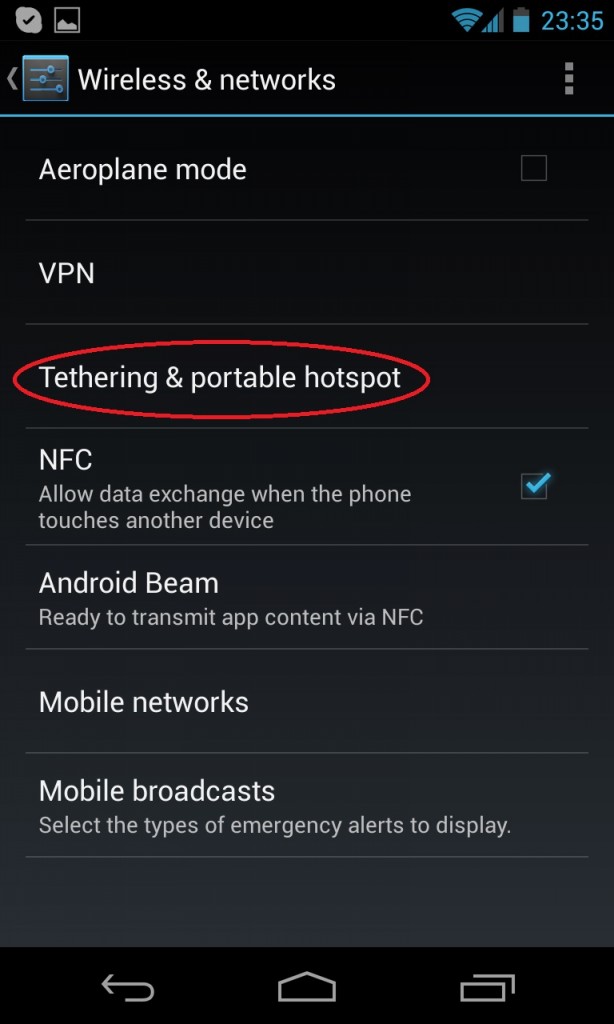
- · Then simply select Tethering and portable hotspot
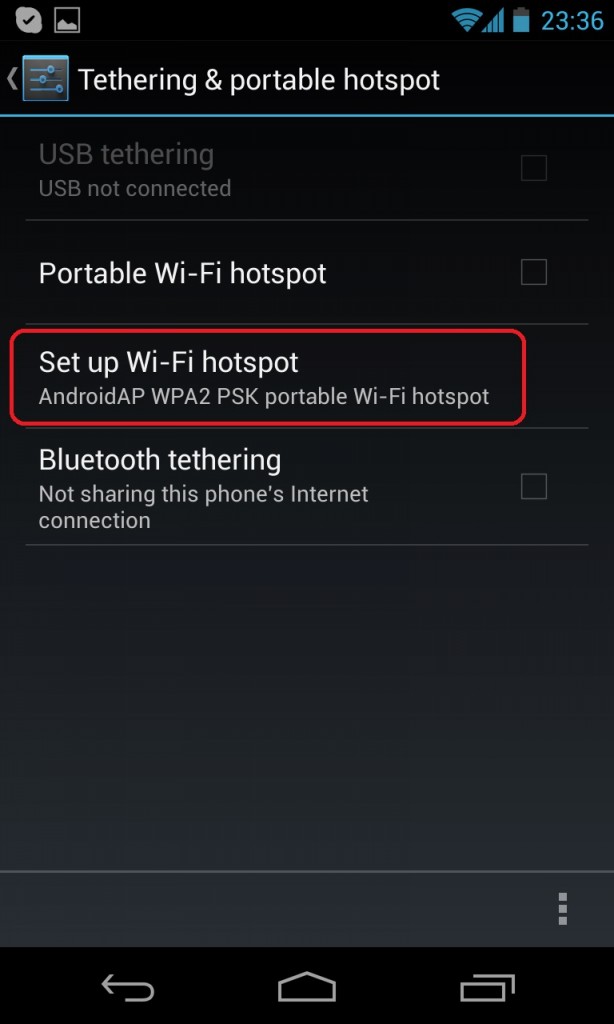
- · Now select set up Wi-Fi hotspot
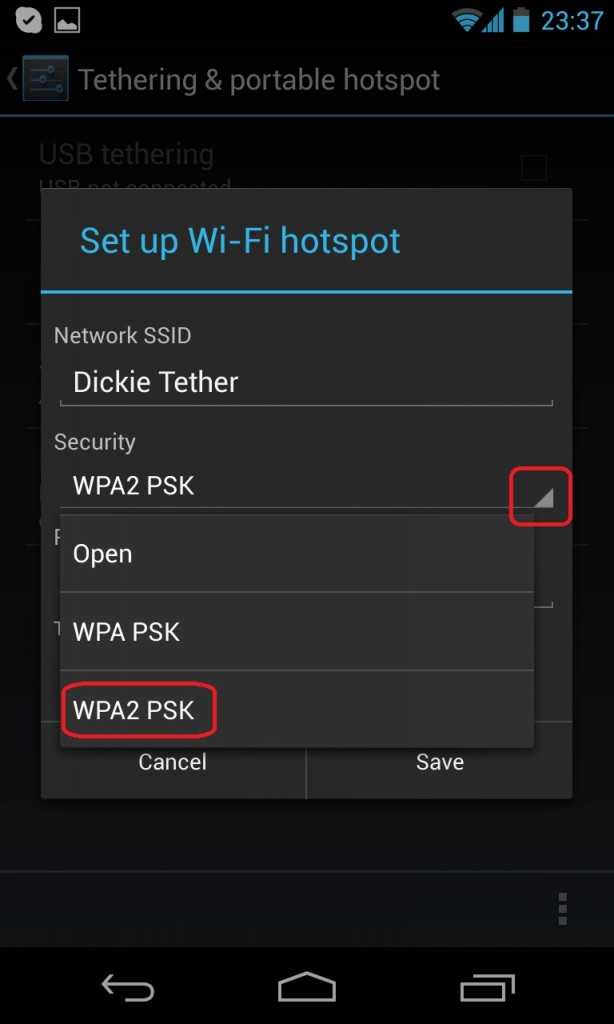
You can change your SSIS by going to the place shown in the picture given below. By default the SSIS will be AndroidAP. Transform this to whatever you need your hotspot to be called. Assuming that you need to leave the security to open you can, in any case take notice that anybody can access the internet via your mobile, If you have your Wi-Fi hotspot left on. It is best to add security to it, so select Wpa2 PSK (orwpa PSK) you can change any of these settings at whenever you want.
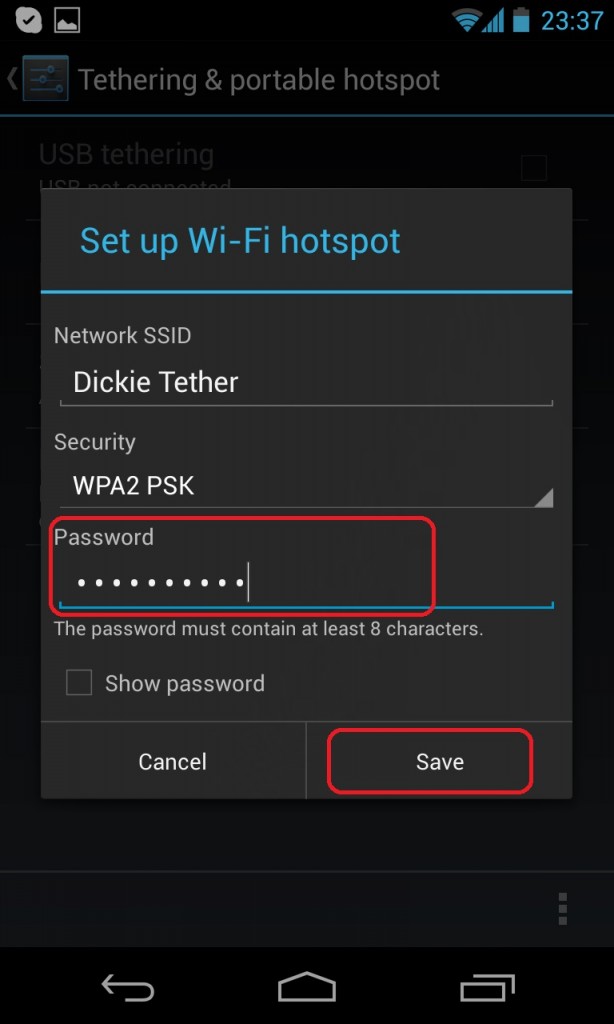
After these all processor now finally create a password with at least 8 characters (try to add some numbers and symbols together) Now Click on the Save option.
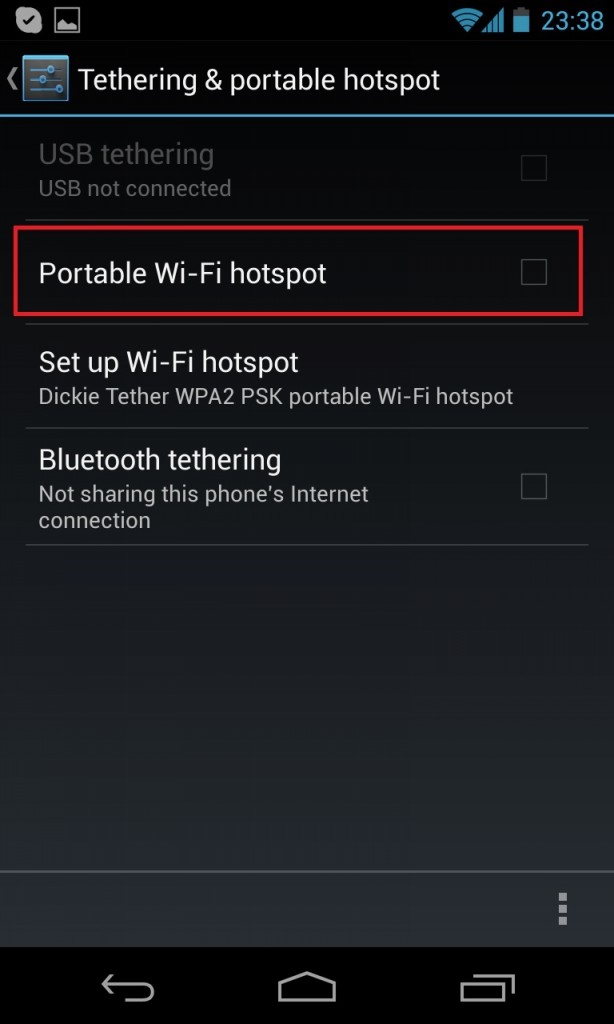
One you save your password you will be taken to back to the Tethering & portable hotspot window, which is still disabled.
Now check the box to enable your hotspot and away you go. You are now connected and can share your phone data connection.
A few things that you don’t have to forget, that check that you are able to use tethering with your data plan, which shouldn’t be an issue with most, but it is good if you checked. One more thing remember that disable your hotspot once you are finished using it, especially if you selected to use an open connection when you setup, allowing anyone to use your data.






How To Setup Wi-Fi Hotspot On The Nexus 4